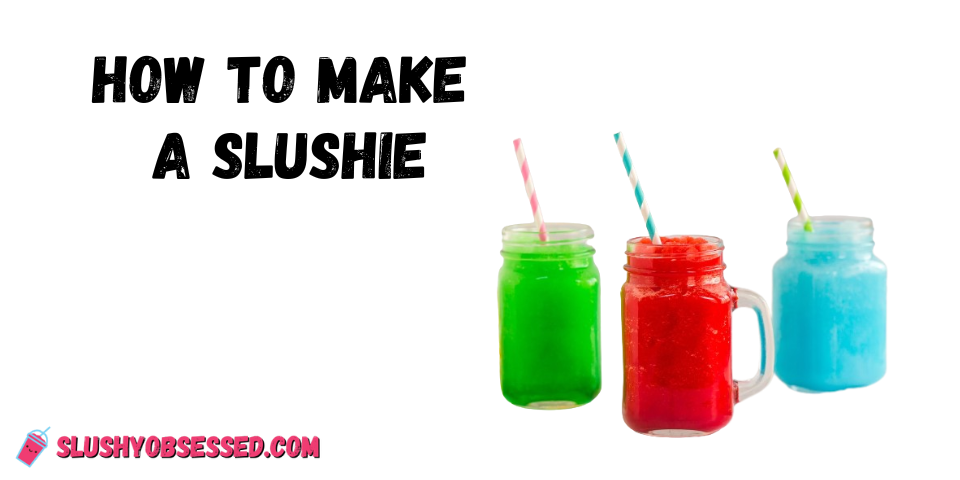
Using a slush machine may seem easy. Just pull the handle and pour a delicious, icy slushy, right?
But it’s not that simple. If you haven’t used a slushy machine before, you might end up with a melted or clumpy icy mess instead of a satisfying slush.
That’s why I’ve created this guide on how to use a slushy machine. It will help you avoid mishaps and make your slushie turn out as good as those from the stores.
Start Here: What to Read First?
How Do Slush Machines Work?
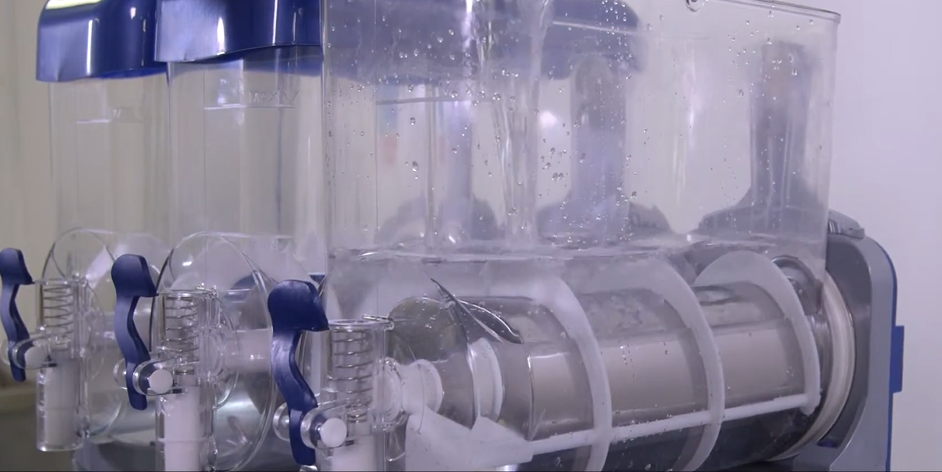
In the market, you can find two types of slushy machines. The first type we often see at gas stations and convenience stores is the self-freezing slush machine.
It includes a compressor and a freezing barrel that turns the liquid mixture into a slushy consistency. To avoid complete freezing, a 13-15% sugar solution is typically added as an antifreeze agent.
An example of this is the Bravo Italia 2 Bowl Slush Machine.
Another type of slush machine commonly used at home is the one that doesn’t have a self-freezing feature. With this type, you’ll need to add ice separately since it doesn’t have a compressor.
Examples of this include the SLUSH PUPPiE machine and the Nostalgia Frozen Drink Maker.
How to Use a Slushy Machine (Self-Freezing)
The best thing I love about the self-freezing slushy machines is that you don’t even need to add crushed ice. The machine does it all with its built-in refrigeration unit, creating the ice on its own.
These machines are also super easy to use. Just throw all the ingredients into the bowl, turn the machine on, and magically transform the liquid into a delicious slushie.
Things You Need to Make Slush Drinks:
- Slush syrup or mix
- Water
- A measuring cup
- Cups and straws for serving
Step 1: Prepare the Machine (Skip if You’ve Already Assembled)
Depending on whether you’re using the single or double bowl machine, simply put all the parts together. It’s pretty straightforward – just insert the auger, add the plastic bowls, attach the handle, and finally secure the lid.
Just make sure to read the instructions to get familiar with all the components, like the drip tray, control panel, and all the safety signs, symbols, and labels.
You should watch this video on how to put together this slush machine. It gives you a detailed overview of all the parts.
Step 2: Prepare Your Mix
Usually, each brand of slushy syrup has its own specific syrup-water ratio. Most mixes use either a 1:4 or 1:5 ratio, which means you’ll need to add 4 or 5 cups of water for every 1 cup of syrup.
Just follow the instructions that come with your machine or syrup to prepare the solution.
And feel free to get creative and add extras like fruit juices, soda, or anything else to add a unique twist to your slushie.
Step 3: Pour the Mix into the Machine

After preparing your mix, pour it into the bowl and be careful not to overfill.
The bowl has special markings to guide you on the appropriate filling level. Leave some space for the mix to expand as it freezes and to allow easy rotation of the auger.
Lastly, ensure the lid is tightly closed to prevent any leakage after filling.
Step 4: Turn on the Machine and Set the Settings

First, locate the main switch on the front or side of the control panel and flip it. If your slush machine has multiple bowls, turn on each bowl individually.
Next, switch on the freeze/refrigerator switch of the desired bowl. Keep in mind that your machine may have different switches for various functions, so check the manual for detailed instructions.
Some machines also have an option for “Slush” or “Drink” mode. Choose “Slush” for a thicker consistency or “Drink” for a more liquid-like texture.
Step 5: Monitor and Adjust if Needed
The turnaround time for these self-freezing machines is usually around 45 minutes to an hour. Of course, it can vary based on the specific recipe, sugar levels, and outside temperature.
If you want to speed things up, you can simply add pre-chilled mix to the bowl. And if you feel the consistency isn’t quite right, feel free to adjust the settings or add more syrup or water as needed.
Step 6: Serve and Enjoy Your Homemade Slushie!

Once the mentioned time has gone by, just check if the mixture has reached the consistency you want. If it has, go ahead and pull the handle to open the spout and pour your awesome slushy into a cup.
How to Use SLUSH PUPPiE Machine
SLUSH PUPPiE machines are way cheaper and way more fun to use.
Sure, they don’t have a self-freezing mechanism, so you gotta add ice separately. But, they still make awesome slushies.
Below, I have shared instructions on how to make a slushie using the SLUSH PUPPiE Machine.
Things You Need to Make Slush Puppies:
- Slush syrup or mix
- Ice (cubes)
- Water
- Salt
- Cups and straws for serving
Step 1: Prepare the Machine (Skip if You’ve Already Assembled)
First, let’s set up your SLUSH PUPPiE machine.
Place the plastic container or Slush Puppie container onto the motor base. Then, put the ice canister cage into the ice canister and insert the assembled ice canister into the Slush Puppie container.
Lastly, fit the canister lid in place and make sure to secure the locking catch onto the rear locking notch of the container.
NOTE: Put the metal canister in the freezer about an hour beforehand. This will bring it to the right temperature and prevent your slushie from turning into a melted mess.
Step 2: Add Ice and Salt Mixture
The next step may seem a bit complex, but no worries, I’m here to break it down for you.
For this machine, you’ll need to add a mixture of ice cubes and salt through the designated Ice/Salt Inlet on the top lid.
But you will have to do this in two stages.
First, half fill the Ice Canister with ice cubes, add 2 inlet caps of salt, and finally, pour in 40ml of water.
Then, for the second stage, fill the rest of the Ice Canister with ice cubes, add a further 3 Inlet Caps of salt, and another 40ml of water.
Don’t worry about adding too much salt; it is just to prevent the ice mix from freezing too quickly.
NOTE: It is very important that your machine is turned on before you start adding the ice and salt mixture. Otherwise, the motor or blade might end up freezing.
Step 3: Add Your Slushie Mix

On the rear right of the Canister Lid, you’ll find another opening called the Syrup Inlet. This is where you’ll add the syrup.
First, mix your Slush Puppie syrup with water, maintaining a 1:5 ratio of syrup to water. Make sure not to exceed the 1-liter limit.
Quick Tip: For quicker slushies, I recommend chilling your syrup and water mix for an hour before using.
Step 4: Wait For 15-25 Minutes
After completing the previous steps, reattach the Inlet Cap and allow the machine to run for around 15-25 minutes.
Please note that this time may vary depending on the ambient temperature. However, it’s important not to let it run for more than 40 minutes.
Step 5: Monitor and Adjust if Needed
As the mixture begins to freeze, monitor its consistency.
When the water level decreases, add more ingredients to the canister. Maintain the same ratio as mentioned earlier or adjust it according to your desired slush consistency.
Remember to keep the ice level within 3cm of the rim of the Ice Canister.
Step 6: Dispensing Slush Puppies

Once your slushie is perfectly frozen and at the consistency you want, it’s time to pour out your ice-cold slushies. But before you do that, switch it from “Mix” to “Dispense”.
Place a cup or glass on the Drip Tray and turn the Tap Handle clockwise to open it up. The slush will start pouring out. Once you’re done, just turn it off.
How to Clean a Slush Machine
To clean your machine, you have two options. The first one is a quick and easy way that you can do on a daily basis. The second one is a deep clean that you should do every few days.
For the quick way, fill the bowl with water and add a dash of detergent. Turn on the machine and let it run for a few minutes without the chilling function.
Drain the soapy water, refill it with clean water, and run it for another minute to rinse out any detergent residue. Drain the water and wipe the machine dry with a paper towel.
For the deep clean, follow the manual to disassemble the parts and wash them with warm soapy water. Rinse them thoroughly. Before reassembling the machine, make sure to lubricate any moving parts with food-grade lubricant.
Best Slushie Recipes to Try
FAQ – Frequently Asked Questions!
Why is my slushy machine not freezing?
The main reason a slushy machine doesn’t freeze is usually due to an incorrect syrup-to-water ratio. Making sure you have the right ratio is key to getting that perfect freezing point.
Also, check for any airflow issues or dust on the condenser – they can mess up the freezing too. Check those areas and clean them if needed.
Can you put any liquid in a slushy machine?
The liquids you can put in a slushy machine depend on the specific model. Some can handle basic liquids like a water-syrup mixture only, while others can handle a variety of liquids.
Using the wrong liquid can cause issues, so make sure to check your slushie machine instructions to know which liquids are suitable.
If you still have questions, make sure to check out my dedicated slushie FAQs guide. It has all the answers you need.